
|
Comparing Drawdowns |
Marcy Petrini
September, 2026
I teach weekly in person for the Mississippi Craftsmen Guild at the Mississippi Bill Waller Craft Center. Students plan their projects with my help, using structures from a variety of books. Recently I realized that the drafts students use can vary with the publication. Furthermore, many publications don’t use a drawdown, just the draft and perhaps a sample of the cloth which is not always lined up with the draft. I decided to clarify the topic, adding the drawdown as well.
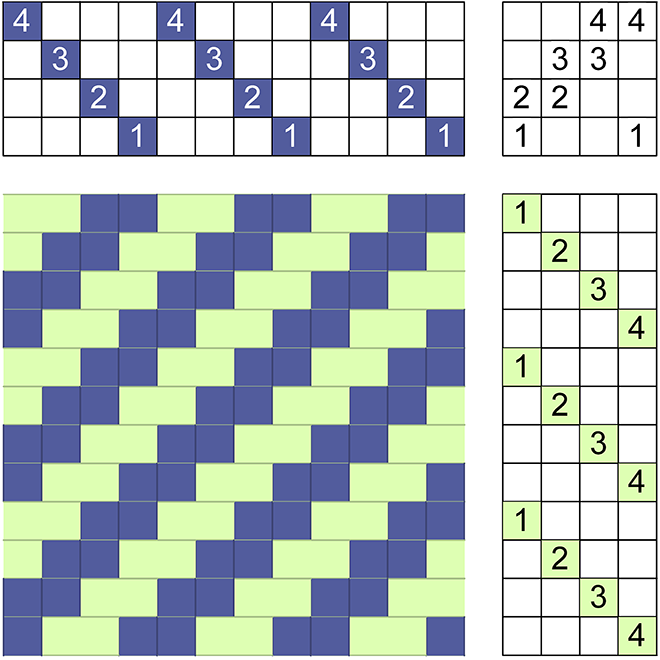 |
| If we were planning a straight twill project, our drawdown may look as shown above. |
 |
|
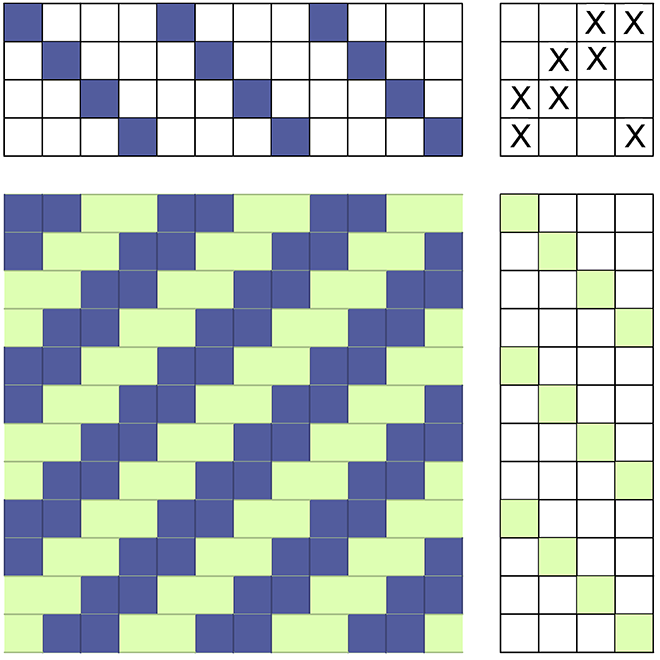
In older books, we may see that the tie-up is filled in with X’s. |
 |
|
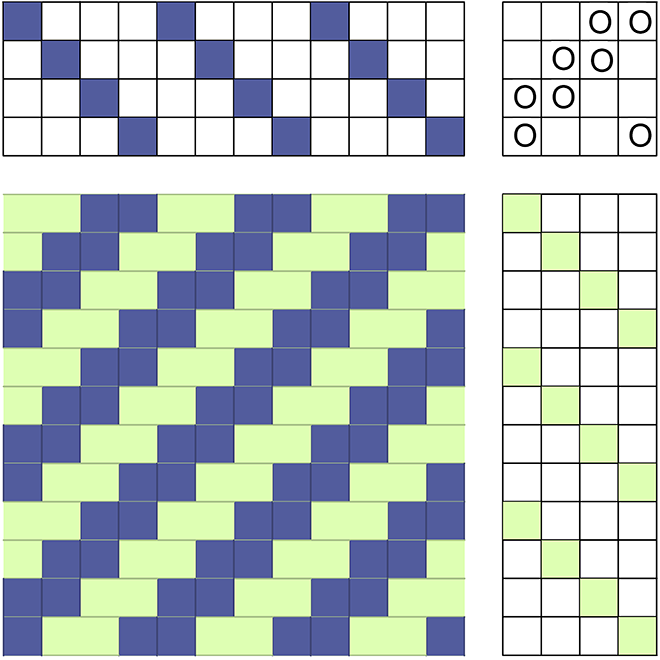
If O’s are used for the tie-up, |
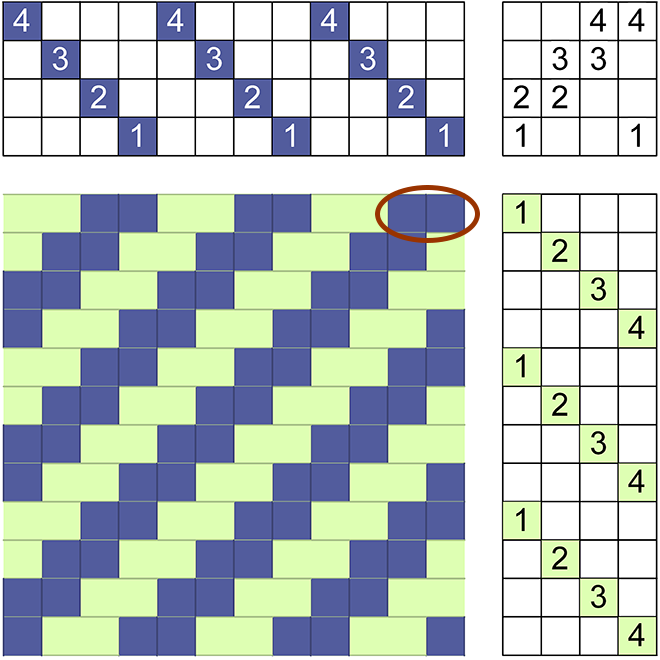
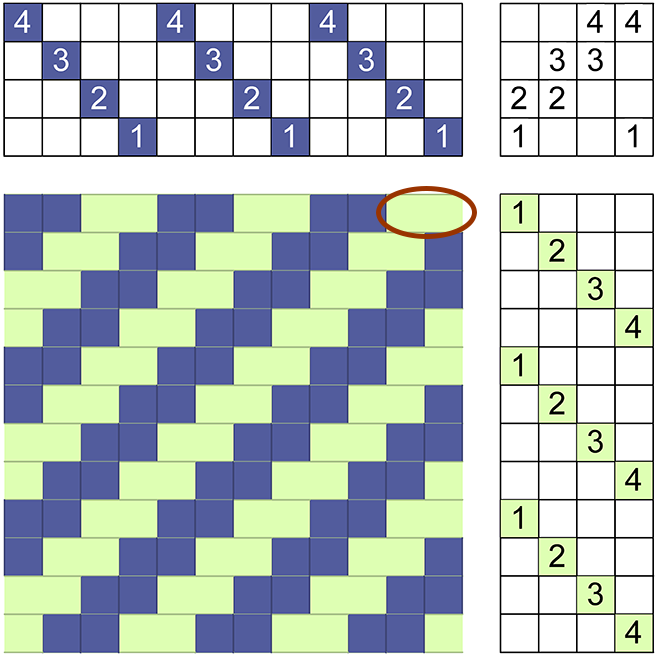
Let’s look at the difference between the two drawdowns below: the one on the left is identical to the first draft we saw, and the drawdown is the same as the one labelled for a rising shed loom, with the first row starting with the blue warp where it’s circled. On the right we have the same drawdown as the one labelled for sinking shed, with the circled first row in yellow-green.
 |
 |
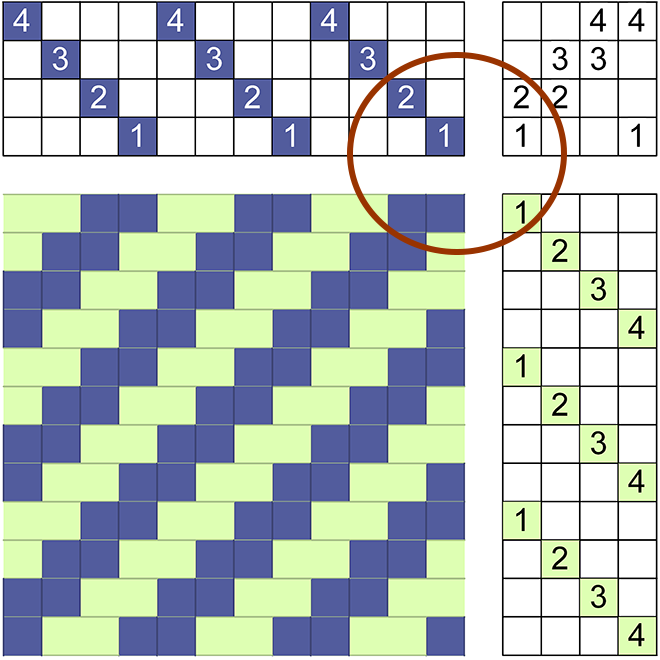
How do we tell which type of drawdown do we have if the tie-up is shown in numbers?
 |
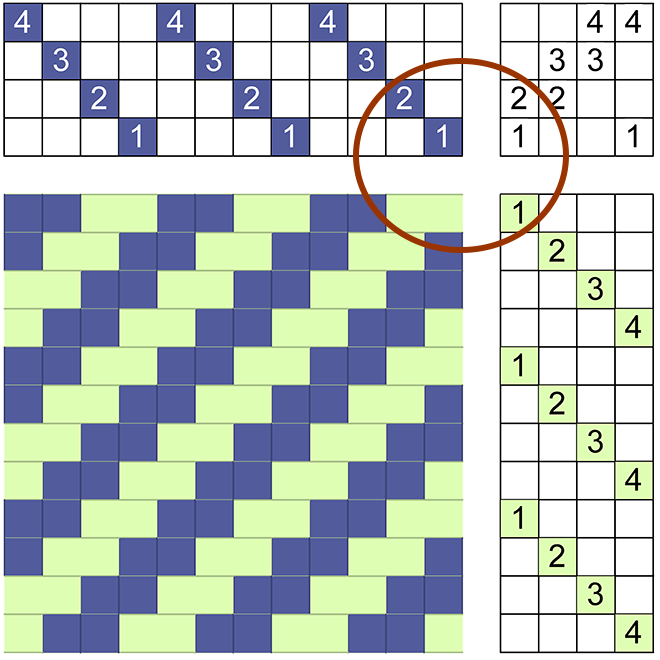 |
Let’s look at the first pick. The threading, tie-up and treadling look the same. However, on the left, the warp color blue shows in the drawdown in the first row; thus, the warp must have risen to form the shed and cover the weft. On the right, the yellow-green weft color shows, thus the warp must have been lowered to be covered by the weft. I like to call the point where threading, tie-up, treadling and drawdown meet, the “magic corner.” It will always tell us what kind of loom the drawdown expects.
Let’s think about the fabric, which has two sides: where the warp shows on the surface we are observing, the weft shows on the other side. I have chosen a straight twill example because it is easy to depict and understand, and it is not symmetrical. In a more complex motif, the fabric may not look like the drawdown. Look underneath!
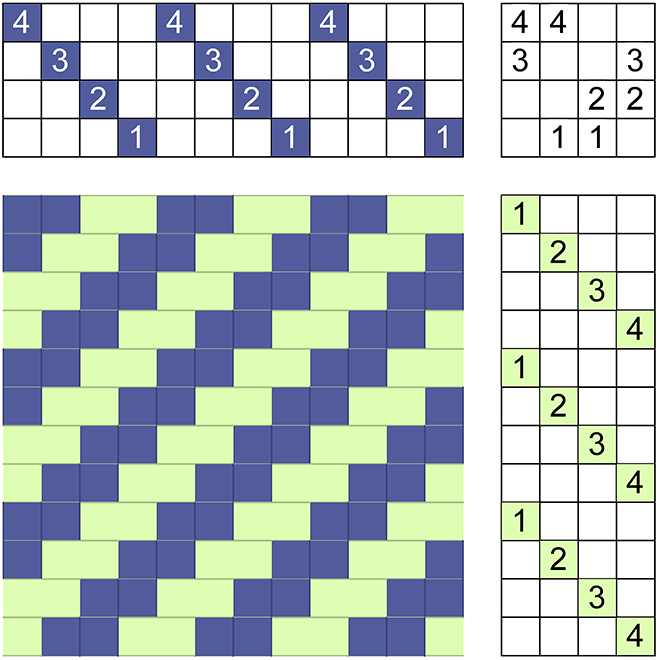
If we are weaving on a rising shed loom and the pattern we want to use is shown on a sinking shed draft, we may want to see the “right” side of the cloth when weaving to avoid possible errors. We can change the tie-up by “tying what’s untied and untying what’s tied.” We can then rearrange the tie-up the way we feel comfortable thinking about it.
 |
 |
|
This also explains why some publications provide the tie-up as shown above. |
Tie-ups are for weaving convenience. Some old looms have a direct tie-up: each treadle is tied to one shaft. Sometimes our six-treadle looms have to be at least partially tied one-to-one because the treadling is complex and we don’t have enough treadles. Table looms and dobby looms are also direct tie-up.
Thus, when we talk about the treadling of a structure, in our case the straight twill, we don’t use the treadle numbers, we use the treadling steps:
| 1 & 2 |
| 2 & 3 |
| 3 & 4 |
| 4 & 1 |
The reason is that the tie-up can change. The ones we have been discussing are the “standard” tie-up for 2/2 twills; these are twills where every shed has two shafts up and two down. For step 1 & 2 of the straight twill, shafts 1 & 2 are up and shafts 3 & 4 are down, or vice versa, depending on the loom. That’s true for every shed.
However, the complete standard tie-up for four shafts includes the two treadles that can be used for plain weave, 1 & 3 and 2 & 4. Which treadles are used for the plain weave tie-up depends on the weaver’s preference. Below are some possibilities:
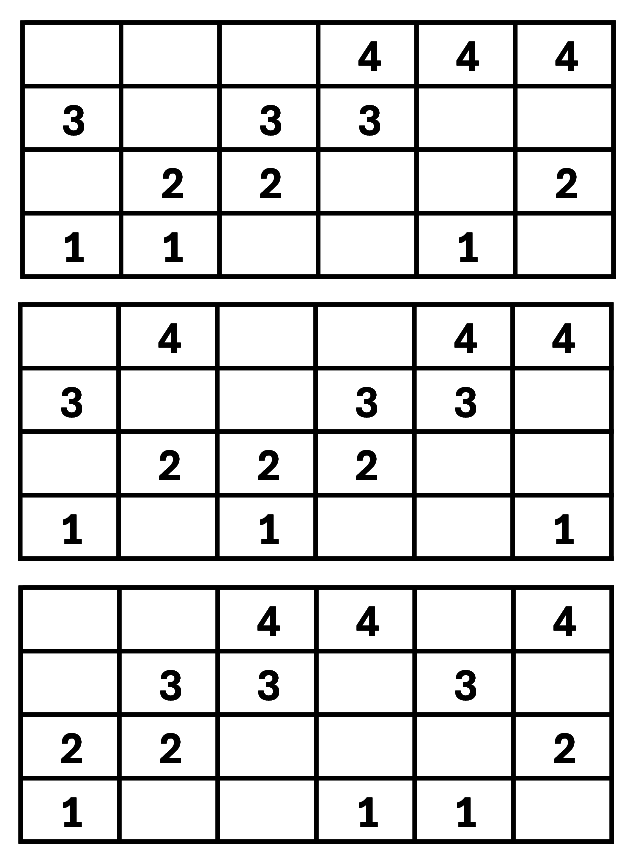 |
Therefore, the 1 & 2 treadling step for the straight twill could be on treadle 2, or 3, or 1, among others.
The complete standard tie-up is needed for some structures, for example overshot. The plain weave forms a balanced grid which is called a tabby. That’s why sometimes 1 & 3 and 2 & 4 are called the tabbies. Technically, however, they are tabbies only if they form a perfectly balanced plain weave with the warp.
The last topic is the direction of the drawdown vs. that of the weaving.
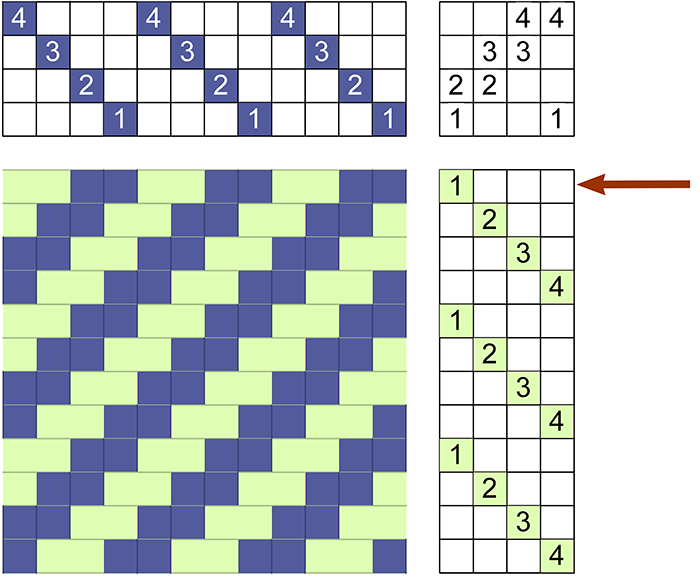
Below on the left is the rising shed drawdown we have already seen, as we traditionally show it, the way we write, top to bottom. Our first pick is shown with an arrow.
 |
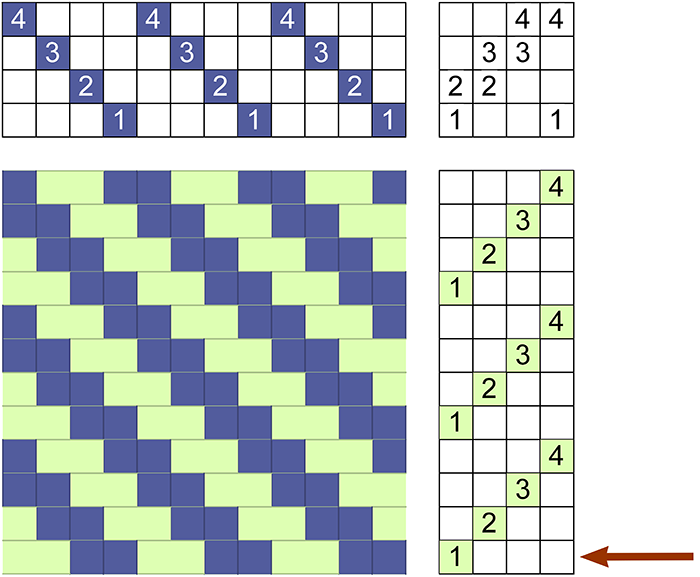 |
On the right is the way we weave, the first pick closer to the front beam, shown with the arrow. The twill slants in different directions.
To avoid potential errors, we can do one of two things, depending on our resources. Some draft applications give the possibility of doing the drawdown from bottom to top. If not, or if doing the drawdown manually (which I did for the first 15 years of my weaving life), we can start at the top with the last pick of the repeat.
If your fabric doesn’t look like your drawdown, think about these possibilities!
Happy planning!
Marcy