Stripes!
Marcy Petrini
January, 2018
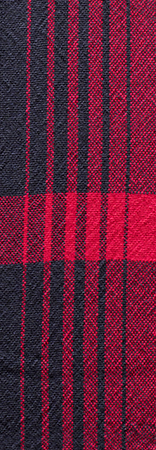
Warp stripes are a (relatively) easy way to add color and design to our weaving – and there are many ways to include stripes, from sequential to random, from one color to several, and from thin to gradation, where we start with a background color and a stripe of a different color and slowly the stripe color becomes background and the background becomes color stripes as in the scarf below:
I say that stripes are relatively easy to add because it is also easy to make mistakes; two tend to occur: one is when we reverse the order of the bouts of warp, the other is when we flip the top and bottom of a bout. Examples will make this clearer and help avoid errors in the future.
Let’s say that we have bouts of 4” for a 20” shawl. This is the color stripes layout we have made; the ground is black; the stripes are in sets of yellow (½”); orange (1”); red (1 ½”):
Bout # 1 = 4” |
Bout # 2 = 4” |
Bout # 3 = 4” |
Bout # 4 = 4” |
Bout # 4 = 4” |
| 4” black | 1.0” black 0.5" yellow 1.0” orange 1.5” red |
4” black | 0.5" yellow 1.0” orange 1.5” red 1.0” black |
4” black |
It is easy to see that swapping bouts # 2 and # 4 with any other bout would cause disaster. Always number the bouts the same way and then place them on the loom in the same way and in order. For example, I always tag the number the beginning of the bout, close to the warping board, and then I place each bout starting at the left side as I face the back of the loom, so that each tag is on the left of the bout. We have to be paying close attention and it’s still possible to make a mistake.
And I have made that error! Fortunately it was before I wound the warp on the loom (I dress from the back to the front); I noticed the odd stripes when I was spreading the warp at the cross; all I could do was re-tie the bouts, remove them from the back rod, and put them back in the right order.
You can have all of the bouts in the correct order and still make a mistake if one (or more!) is flipped. For example, image bout # 2 above, lined up in the back of my loom:
| ||||||||||||||| | ||||||| | ||||||||||||||| | |||||||||||||||||||||| |
But if I flip the bout, my order will be red, orange, yellow and black. Not good!
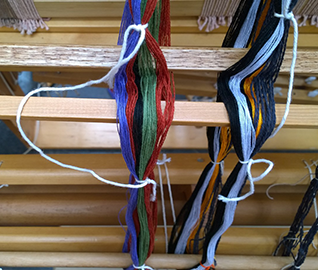
This flipping can be avoided by tying the cross at the warping board differently at the top and the bottom.

In the figure above, you see that the top of the cross was tied with a yellow handle, the bottom with two separate red ties.
On the loom, the lease sticks are added so that the handle (white in this case) is up, as shown below. This helps not only with keeping me from flipping the warp, but also from twisting it, where one lease stick has the top of the warp on top and the other the bottom of the warp on top.
These type of errors, too, require re-placing the bout in the correct order and orientation. It is better to avoid it.
How do we design stripes? The February blog is just around the corner….

Please email comments and questions to